Saturday, September 28, 2013

The 100 Mile Challenge: Can You Do it?


Regardless of where you live, there are great artists and great local businesses that sell local products.  Here in Freddy Beach (a.k.a. Fredericton) we are blessed with an abundance of great local treasures.  So, I started thinking, why not focus my gift giving this year on what I can find made, produced or manufactured within 100 miles of my City.  (I even made it easier on myself by making it miles instead of kilometres!)  I didn't stop at my gift giving; I challenged my family too! 

Now, the question is:  are you up to taking the 100 Mile Challenge?  Can you focus your gift-giving to 100 miles of where you live? 

To make things a bit easier here are some local products and businesses. I did my best to keep them to the 100 mile limit and checked most, but not all for the distance. I also did my best to find websites or Facebook pages for the list. Unfortunately I could not find all of them. 

And, thanks to all those that contributed to this list.  There are too many to list, but suffice it to say my Facebook friends came through with flying colours when suggesting great product/places.
D.E. MacLean Original


  1. Aitkens Pewter
  2. Alice Sahagain (stained glass murals from Hartland)
  3. Andrei Master Tailors
  4. Angel Terry (paintings)
  5. Appleman Farms
  6. Atlantic Pewter
  7. Beaverbrook Art Gallery (memberships)
  8. Boyce Farmers Market
  9. Brent Rourke (cabinetmaker)
  10. Briggs & Little Woolen Mills
  11. Brunswick Sardines
  12. Buckwheat Pillows
  13. Chickadee Larder
  14. Chocolaterie Fackelman
  15. Coburns Apple Cider
  16. Corey Nutrition Company
  17. Covered Bridge Potato Chips
  18. D.E. MacLean Originals
  19. Dale Carruthers (painting)
  20. Danny's & Trudy's 100 Soywax Candles
  21. Deborah Wybou (Jewellery)
  22. Dumfries Maples
  23. East Coast Candles
  24. Feet Freedom
  25. Flight of the Eagle Jewellery Arts
  26. Flo Greig Pottery
  27. Freddy Bear Paws
  28. Fredericton Botanic Garden
  29. Fromagerie au Fond des Bois - Fine Cheese Maker
  30. Frosted Cupcakes
  31. Gagetown Fruit Farm
  32. Ganong Chocolates
  33. Goodine's Eggs
  34. Gooselane Editions
  35. Granit Town Farms
    Flo Grieg Fiddlehead Pottery
  36. Grey's Nursery
  37. Harvey's Big Potato
  38. Hunter Brothers Farm
  39. J Kelly Pottery
  40. Joe's Woodworking
  41. John Henry's Fresh Fish
  42. Judy Blake Pottery
  43. Juliette's Pottery
  44. Kaga Knits
  45. Kenneth Maple Farms
  46. Kings Landing
  47. Kingswood Park
  48. Kris LeBlanc Art
  49. Kyle's Photography
  50. Lavish Handcrafted Soap
  51. Lemon Balm Lane
  52. Loomscrofters
  53. Mactaquac TreeGo
  54. Magzy Kettle Korn
  55. Matt Andersen ( a must listen)
  56. Maurice Gamblin
  57. McCabe's Ice Cream
  58. McCain Foods
  59. Miramichi Smoked Salmon
  60. Motts Landing Vineyard and Winery
  61. Moxon's Country Pumpkin
  62. Nashwaak Noodles
  63. New Brunswick Highland Games
  64. New Brunswick Spirits Festival
  65. New Brunswick Sports Hall of Fame
  66. Nikki's Homade Fizzy Bathbombs
  67. Northern Lights Leather
  68. Picaroons
  69. Puppy Paw Biscuits
  70. Raven Glass Studio
  71. Real Food Connections
  72. Roland's Sea Vegetables
  73. Rowan's Greenhouse
  74. Sabian Cymbals
  75. Samosa Delight
  76. Sanctuary Botanicals
  77. Sarah Irvine McIntyre (woven products)
  78. Scott's Nursery
  79. Silver Wave Film Festival
  80. Siverwood Stone
  81. Solidstone Creations (And apparently a neighbour!  My new mission is to meet the artist)
  82. Soulflower Herbals
  83. Stone Works
  84. Sweet Cheeks Treats
  85. Sweet Valley Herbs
  86. Symphony New Brunswick
  87. Tasha Tea Soap
  88. The Cheese Market
  89. The Cock & Hen Domestic Fowl
  90. The Nut Hut
  91. The Playhouse
  92. Tim Isaac Pottery
  93. T-Ray Woolies Angora
  94. Van Dyk's Wild Blueberry Juice
  95. Victor Bear (Maliseet Baskets)
  96. Weber's Wrought Iron Works
  97.  Wellwood Farm
  98. Winegarden Estate Ltd.
  99. Wooden it Be Nice
  100. Wooden Puzzles

What are your favourites?  What would you add to the list?  Remember the 100 mile condition.


Sunday, September 8, 2013

There is Just Something About Fall! Am I Right?

There is something about fall.  For me it is about new beginnings.  It always has been. 

Perhaps it is tied to going back to school each year. I was one of those kids that loved going back to school.  The new books, clothes and supplies were exciting to me.  Seeing people I hadn't see for months was thrilling.  This experience was so profound for me that I have continued to "go back to school" over and over.  While I might stray for a year or two, I can't stay away.  Hence my decision to pursue my PhD.


Maybe it is because I was born in the fall.  You can't get more of a new beginning than a birth or a birthday.  As you get older, your birthday becomes more about reflection than anything else.

Then again, it is also harvest time.  I grew up in a family that loved to garden.  We had a huge garden where we grew everything from beans to carrots to corn.  Now, I have my own assortment of gardens, including my own vegetable garden.  While it is sad to cut everything down and prepare for the next season, it is also exciting to harvest your own vegetables.  It is exciting to think about what really worked that summer and what you want to improve upon.  I barely get my garden put to bed for the winter and I am already sketching out new ideas and making plans.  I drive my husband crazy with this.


The other part of fall that I absolutely love is Thanks Giving.  Also a big part of the harvest is of course using all those great fruits of your labour to make a great meal.  Then of course Thanks Giving gives way to Christmas.  To me both of these holidays are about family and friends.  


So, I say bring on fall.  Bring on fall with all her splendour, colour and change.  After all, nothing stays the same and nothing says change more than fall.

What is your favourite memory, tradition or part of fall?

Friday, August 23, 2013

Think and Drink Local: A Review of Motts Landing Wine

As I get older I think more about what great things we have right here at home and in this case, I say "think local and drink local" after tasting the wines from Motts Landing.

While on our "staycation" we visited Motts Landing for a tasting.  We tasted five wines in total and here is what we thought:


Image courtesy of http://www.mottslandingvineyard.com/ 


1.  Frontenac Reserve -  This $17 bottle of wine is smooth and full bodied and full of flavour.  It is fantastic with lamb.  Yes, we bought a bottle and yes, we will buy more.

2.  Frontenac - For $15 a bottle, this would also be a good buy.  It was also very pleasing to the palette and while we didn't buy this time, I would buy it in the future.

3.  Prairie Star - This was a nice light wine and for $17 a bottle it is a good buy.  Would be great for a hot day.

4.  Frontenac Gris - This $16 a bottle of wine was surprisingly my favourite.  I usually gravitate to the drier wines, but this one being a little sweeter was really, really nice.  We bought two bottles of this one so that tells you it was my fav!


Image courtesy of http://www.mottslandingvineyard.com/

5.  Wild Rose - If you like rose wines, this $15 bottle will likely please.  We are not big fans of rose wines so this was a miss for us.  In fact, I have to be fair and state this as a bias and would recommend that people try this wine for their own assessment.  After all, we enjoyed all the other wines that we tasted.

In addition to the tasting, the location is beautiful.  It is a must visit in my opinion.  The only caveat is to drive there via the Jemseg route.  Don't go via the Cambridge Narrows route, unless you want to tear the bottom of your car out.  The road is in desperate repair and despite many appeals from many people, the call to fix that road seems to be missed.  

Over and above the wines we tasted, we also bought a bottle of the Cranpagne.  Can't wait to try that out.  I am expecting great things based on what I have tasted thus far.

So, as I think more about buying local and supporting local businesses, artisans and craftspeople, I can see that Motts Landing wines will be on the list for gift giving this Christmas.

I want to thank Sonia for making us feel very welcome and telling us all about the wines and the history of the vineyard!  I wish that they had a social media presence, but do not. In fact, my only suggestion for improvement for them is be on social, or at least remove the Facebook and Twitter icons from their website.  The icons actually take you to someone else's social channels, which is just bizarre.  


Monday, August 19, 2013

5 Considerations When Decorating With Colour

Recently a friend asked me for advice on picking colour.  She is completely lost when it comes to what works and what doesn't.  So, of course I couldn't resist helping.

Those that know me well, know that my favourite colour is blue. It has been since I was a little girl.  Those same people who have been to my home over the years might also realize that my colour palette has changed over that same time.  Shortly after moving into our house, more and more things became blue.  Now, those things are now warmer jewel tones.  So, what changed? My favourite colour has not changed, so why did my colour palette in my house change?

Over time, trends change and even colour preferences change in terms of what inspires you, what is available and what looks good in your home.  Style of home, natural light available and actual function all impact your choices for your home.  The key to making the change easily and cost-effectively is choosing colour and knowing where to use colour.  Here are some easy tips to keep in mind:

1. Don't Go Overboard with Colour

Loving a colour doesn't mean that you need to add it to every surface in a room.  In this pink bathroom, the pink in my opinion is overwhelming.  While it is very retro, should the respective owners decide to change this bathroom, they will have major job on their hands.  If you have the budget for a gut, no problem.  If your budget is more reserved, some ways to tone down this bathroom include stripping the wallpaper and painting with one neutral colour. In addition, curtains, blinds, towels, etc. should be the same neutral colour.

Photo Courtesy of http://tilelifestyle.com

2.  Choose the Right Surfaces for Colour

Keeping mind that tastes and trends change, apply colour to the things that are easy to change and cost-effective.  For example, wallpaper, paint, curtains, rugs, etc. for colour.  Go neutral colours for appliances, sinks, toilettes, tubs, tile, etc.  These are the things that are not easy to change and cost a whole lot more when you tire of the colour or style.

3.  Love It!

Be sure when you choose colours that you absolutely love it and want it for awhile.  Even though you are applying colour to the things that are easy and cost-effective to change, you want to have them around for a little while.  So, be sure that you won't tire or be bored with the colour in a couple of months or even a year.  That too can become expensive.

4.  Consider Your Other Visuals

There are a lot of "rules" around choosing colour and using different colours in rooms that flow into one another.  I say phooey to most of them.  I use different colours in different rooms. I can see the colour from different vantage points and it differentiates the rooms.  I do try to keep the weight or the value of the colour the same from room to room so that one does not overpower the other though.  

5.  Consider Existing and Future Purchases

Don't forget what you already have in terms of colour. Will your new choice work with what you have.  It doesn't have to match perfectly, but it should "go" with what you are doing.  Also, are you planning on buying new furniture?  If so, be sure that your new colour choice "goes" with the intended purchases.

These are just some colour tips from At Home At Evergreen Cottage.  What are your tried and true tips?


Tuesday, August 13, 2013

Product Review: Rust-Oleum Cabinet Transformations


Like many I have an older kitchen, but I am not yet ready to gut the thing.  So, I have done my own renovations to my kitchen.  Yes. Me.  I have quite a few cabinets and years ago, when hubby was at the Lake, I had this brilliant idea of how I was going to make the bulk of my cabinets look good.  That is a different blog post. I am still happy with "them".  The remaining cabinets however, were a different story.  I liked them for years in their pretty Wedgwood blue, but they really didn't match the rest of the kitchen now.  So, that is were my product review for Rust-Oleum Cabinet Transformations come in!

I have been thinking about painting these cabinets for sometime.  However, I didn't have consensus on this project.  This past weekend was my chance.  It was time for the Lake visit without me.  So, off I went to Home Depot with plans to buy melamine paint to redo the Wedgwood blue.  Low and behold I am informed that you can't get melamine paint any longer.  So, I had two options:

1.  sand, prime and then paint the cabinets.  
2.  purchase the Rust-Oleum Cabinets Transformations.

The cost was going to be roughly the same for whichever option I chose.  The difference was going to be in the mess, the labour required and the time.  After some consultation and discussion with the Home Depot Rep, I opted for Option #2.  

Contents of the Rust-Oleum Kit, plus the extras needed

What I liked:

The kit is pretty complete.  The only extras you need are plastic, painters tape and paint brushes.  There is also an instructional DVD, which is awesome for those of us who are visual - which by the way is 73% of us.

The instructions were straight forward.  I read the booklet and watched the video. Because this involves my kitchen cabinets I wanted to make sure that I did this 100% accurate according to the manufacturers instructions.  I don't want my cabinets looking like crap tomorrow, next week or even two years from now.  The last finish was durable and looked great, despite the colour.

Cabinets in Blue


The prep work was straight forward and once I had everything covered, taped up, hardware removed, and washed, I was ready for Step 1 - the de-glossing.  That was easy and went well. In all, this took me about two hours.  I then had to wait an hour before Step 2.

Step 2 - applying the paint.  The smell of the product was pleasant at first. I thought it smelled like cocoa.  However, after two and a half hours of painting, I had a headache and this was despite good ventilation.  The next day I applied the second coat and in some cases a third coat in order to fully cover the colour.

Step 3 - applying the protective coat - a.k.a water-based varnish.  This part of the process went the fastest.  

Cabinets (after) that match backsplash on other cabinets

What I didn't like:

I consider myself quite a seasoned painter.  I have been painting since I was a kid and I know how to paint. In fact, I am a careful painter and was wearing a good sweater and skirt the first night I was painting. I am cautious, take my time and precise.  I was checking throughout the process for drips.  When I went to bed that night there were NO drips anywhere.  The next morning when I got up and went into the kitchen my eyes when directly to a couple of areas where the paint accumulated in ugly drip formations.  I would not consider this a product/project for people just trying painting for the first time. I would not consider this product for people who want faster results and don't take the time to do things by the book.

It was a good thing that I had plastic at home.  The Home Depot Rep mentioned nothing about needing plastic to cover "stuff".  She also tried to convince me to buy three new brushes because each step needed a "different" brush.  That is not an accurate assessment at all. Because I clean my brushes properly I could have used the same brush.  Additionally, the de-glossing does not use a brush.  Instead you use the scrubby things provided "in the kit."

The Overall Verdict:

For now, I am giving it a "Let's See" approval rating from the At Home at Evergreen Cottage. Aside from the drip marks, the kit is well done giving you pretty much what you need, including great instructions.  At this point however, I have my fingers crossed that the overall finish on the cabinets will endure.  I am not yet convinced that I won't start to see tiny bits of paint coming off and then seeing bits of my old blue coming through. Fingers are really crossed tightly now.

On a side note, there is also an option glazing process that you can do. Because my cabinets in this area are just plain and have no profiles, I opted not to try this part.  It wouldn't have been an improvement.  

NOTE:  I was neither approached nor paid to try this product or write this product review.  

Friday, August 9, 2013

Product Review: Burt's Bees for Dogs Oatmeal Shampoo

It was Spa Day for Seven!  How Did Burt's Bees Stand Up Against Seven and THE Fur?

Let's face it.  I have a 92 pound dog with more fur than most people would ever want to experience.  A Rough Coat Collie is the epitome of fur and lots of it!  Between shedding, bathing and grooming, I live with fur.  So, when I saw Burt's Bees for Dogs Oatmeal Shampoo, I thought I would give it a run for its money.

Thankfully, Seven is a house dog and doesn't need to be bathed often.  Couch potato dogs just don't get as stinky and dirty as outside dogs.  There is no rolling in the grass, mud or other things that will go unmentioned here.  He is brushed daily, and several times a day at that and spot cleaned if necessary.  The thing you notice sometimes with a dog like Seven is that he gets dry skin.  Really dry skin needs special attention.  That special attention is usually a bath and a good shampoo that gets to the skin and soothes the skin. Burt's Bees you had your work cut out for you between the crazy amount of fur to get through and the dry skin!


Seven During the Bath


Apres Bath and Slowly Drying
So, what is the verdict?  Did we like the results of using Burt's Bees Oatmeal Shampoo for Dogs?  YES! And here is why:

1.  The fragrance was nice and not over powering.
2.  Despite having a dog with so much fur, it was easy to get the product to lather and then to rinse.  Rinsing Seven usually takes much longer and requires more water.  It was much quicker with Burt's Bees.
3.  Seven's fur is so beautifully soft.  His coat feels like silk after this latest bath.
4.  The dry skin issue is completely cleared up.  Seven's skin looks nice and clean.
5.  There was no residue left in the tub after Seven was out making it a much quicker and easier clean up.


Seven Bathed and Completely Dry with His New Fav Shampoo!

As you can see by the photo above, Seven's fur has completely dried and has expanded to its full and natural volume.  In the picture is the shampoo that we used (on the right).  On the left is a different shampoo to use if you don't want to bath the whole dog.  We haven't tried it yet, but I am sure that we will. When we do, I will let you know how it goes.  

For the regular Burt's Bees Oatmeal Shampoo for Dogs, I am giving it a At Home at Evergreen Cottage Stamp of Approval!  

NOTE:  I was neither paid or approached to do this product review.

Monday, July 29, 2013

3 Unconventional Ways to Arrange Flowers - Rethinking the Bouquet

I love flowers.  I love having them all around me in my garden and I love having them in the house.  While preparing for a dinner party yesterday, I picked up some Mums.  Lovely yellow Mums.  I didn't want to do the standard vase display.  I wanted something different.  So I did something different.  Here are a few different ways to showcase your beautiful flowers.

1.  Don't Be Afraid of Using Unconventional Vessels!

Doing the same-old, same-old gets boring for me.  Just because a tea cup is made for tea, doesn't mean you can't use it for something else.  Take a look around your house.  What is interesting and fun? What other purposes might it have?  


Antique Tea Cups, Antique & New Creamers, etc.


2.  How Low Can You Go?

In this case, I wanted colour and flowers on the table that were not going to obstruct the view of anyone eating.  So, for inspiration, I went to my cupboard.  What vessel did I have that was interesting and low enough to use?
Olive dish and Mums - Before
Olive dish and Mums - After


In this case, I used a olive dish and cut the stems short enough that they would just rest in the vessel.  The proliferation of colour is powerful against the tablescape and makes it very easy to look across the table.


3.  Small Groups Can be Fun!


Colour, Texture and Different Vessels Make this Stand Out.


What have you used to display your flowers?  I would love to hear.  

Sunday, July 21, 2013

Protecting Your Garden During Extreme Weather

If you live on the Eastern Seaboard, then you know that the past week has close to unbearable with the extreme heat.   While the heat is hard on us, it is also hard on our gardens.  Here are three things you can do to help protect your investments - time, money and your ecosystem:

1.  Water at the Right Times 

Don't waste water.  Your plants, your neighbours and in some cases your pocketbook will thank you.  Watering in full sun is a waste all-around. Most of the water evaporates before reaching the plant. In some cases it might even promote the burning of leaves.    Water first thing in the morning or early evening after the sun has started to descend. The morning is really the best however. If you can manage it, do then.  Watering in the morning helps avoid mold, mildew and pests.  
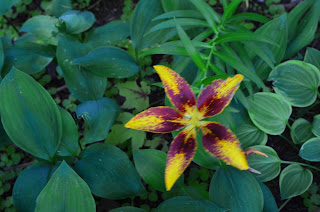
Lily from Back Garden

More Lilies from Back Garden


2.  Deadhead 

Be sure to remove all dead flowers and leaves.  This will keep the area clean and tidy and less desirable to pests.  It will also make it easier for watering.  The path will be quicker for the plants to absorb water if the debris is removed.

Garden:  May 
Garden:  July (Rhubarb relocated)

3.  Weed 

Another important component to helping your garden thrive, is weeding.  Keep the competition for water and nutrients at bay by weeding frequently. 

Hosta - Back Garden

These are three easy way to help your flower and vegetable gardens thrive in hot temperatures.  What would you recommend?  What are your top three?

(remember for those reading this via email, you can get the full experience by visiting my blog:  http://athomeatevergreencottage.blogspot.ca/

Tuesday, May 14, 2013


5 Tips for Choosing Your Summer Plants


Finally, it is time to get out in the garden and get our hands dirty!  I have been dreaming of this all winter.  So, with that being said, what should we be looking for when choosing our summer bedding plants.  Here are a few tips to consider when just starting out:

1.  Time - If you don't have a lot of time to look after your plants, be sure to select varieties that are draught tolerant, for example.  When doing container planting choose soil that retains moisture and helps cut down on the times you need to water. 

2.  Location, location, location - Not just for real estate!  Be sure to know whether your location of choice for your plants is full sun, some sun, some shade or full shade.  Knowing this will help you select plants that will thrive in the right conditions.  Be sure to read the plastic insert that comes with the plants before making that purchase.  (but please put the insert back with the plant).

Not for container gardening. This Joe Pye Weed grows about 10' tall.


3. Healthy Plants - Always be sure to check plants and select those that are green, pest and disease free.  They should have strong sturdy and self-supporting stocks.  If you see plants that have a significant amount of yellowing leaves and/or have leaves that have been obviously munched on, move on. Some yellowing of the lower leaves could just mean inadequate watering. Of course, if the flowers are spent and the plant itself is fine, simply deadhead.  That plant is fine.

4. Colour - While not as significant as our first three, you definitely want to think about your colour scheme.  Yes, you need to have a scheme.  While variety is nice, too much colour without a focus will result in the eye being confused.  You know the saying...too much of a good thing...Instead pick one or maybe two colours to focus on.  For example, my colour this year is red.  My front hanging baskets, pots at the front door and my window boxes are made up of red geraniums and a variegated trailing plant.  Simple yes, but they will be stunning once established. The volume of red will be gorgeous.  For my back yard, I will add one more colour.  In a bigger space with much more competition amongst trees and shrubs, I can add another element.
My freshly planted front boxes.  

5.  Don't buy on your first visit - Despite being super excited to get out in the garden, I have already been to three different nurseries three times each.  The first time at each I did not make a purchase. I wanted to get a feel for what each had and what colours were really calling to me.  Not all nurseries will have the same exact colours.  I also wanted to get what really excites me.  Buying on your first visit might result in you spending more in the long run.  Take your time and find what is right for you.

Naturally there are more ideas when buying bedding plants, but these are a few good ones to get you started. Any you would add? 

Sunday, March 17, 2013


Determining Your Gardening Style – Part 2


In my last post, Determining Your Gardening Style - Part 1, we looked at defining gardening styles:

1.  The Romantic Gardner;
Definitely the Romantic Side of Gardening
2.  The Busy Gardner;
3.  The Novice Gardner;  
4.  The Intermediate Gardner; and
5.  The Expert Gardner.

Do you know what style of gardener you are?  If not, let's start with some questions to get those green thumb juices running:

1.   How much time do you have each day to dedicate to gardening?  Do you want to spend an hour each day?  Or 10 minutes per day?  Be realistic.  What time do you really want to spend on gardening and how much time do you really have. 

Another garden shot - Hanging Pot in Background  - 2012
If you have less than 30 minutes a day, you are likely a Romantic and/or Busy Gardener.  Nothing wrong with that!  Now we know a lot about what type of garden you should have!  For these two styles of gardeners, it is recommended that you focus on container gardening. (more on that in my next blog)

If you have more time to spend on gardening ask yourself these questions:

2.  Where do you live?  What might seem like a trivial question, is actually the most important one when gardening.  Here are the pieces of information that you need to consider about your geography:
a.    What zone do you live in?  North America is divided up into 12 different “hardiness” zones and each zone is further subdivided into “a” and “b”.  When considering perennials for example, you must know your zone so that you can chose plants that will survive “your” winter.  Once you know this, you can choose your plants with a much greater level of confidence!  More information on hardiness zones can be found at Hardiness Zone Information

b.    Do you live in an apartment with a balcony or terrace? Or, do you live in a rented house? Or, do you live in a detached house with your own yard?  In other words, how much space do you have to garden?

3.  What direction does your space available for gardening face?  In other words, how much light do you get?

4.  If you are planning on planting in an actual garden plot, do you know what type of soil you have?  Is it clay-based?  Is it sand-like?  Understanding your soil composition will ensure that you are able to garden with success.  If you have clay soil, you will want to amend it with peat moss for example. 

Lilies from my garden - 2012
5.  What do you want to achieve from your gardening?  Do you want to have vegetables that you can share with family and friends?  Do you want vegetables that you can consume immediately? Do you want to can your vegetables for use over the winter?  Or, do you just want some flowers for your table and/or your terrace?

6.  Do you travel often?  If so, do you have someone who can care for your garden or plants while you are away? 

Now that you have answered these questions, we can determine what three remaining Gardening Styles you fall within and how you can make your gardening experience a good one. 

If you care to share the answers to the questions here, please do.  In my next blog post, we will look at some answers to these questions and what steps to 

Sunday, January 27, 2013

Garden Style - Part 1


Determining Your Gardening Style – Part 1

Are you new to gardening?  Are you wondering where you start?  Should you go big or start small?  If you have these questions, then you have come to the right place.  Determining your gardening style will help you start out on the right foot!  So, grab your favourite cup of Joe and let’s figure our your gardening style.

First let’s define a few styles.  As a qualifying statement, these are styles that I have defined.  I am sure that other gardeners have their own definitions and there could even be formal more official definitions out there:

The Romantic Gardner is someone who absolutely loves the idea of gardening – the roses that you pick each morning, the basket full of vegetables that makes the perfect photo for Instagram – but may not realize the planning and work that is required to make the bounty occur.  The Romantic would prefer not to be tied down to daily gardening tasks. 

The Busy Gardner is someone who wants to have a garden that is easy to access, easy to maintain and produces quick results.

A potted Geranium from my deck (2011) makes a great splash of colour.  

The Novice Gardner is someone who gets the amount of work required, but sometimes takes on an over-ambitious project when first starting and may not know all the information needed for their particular garden needs.

The Intermediate Gardner has been gardening for several years and takes it upon herself/himself to ensure continuous learning through experimentation, research and knowledge sharing with other gardeners.  This Gardner may have a small terrace garden and/or a large in-ground garden plot. 

"The Expert Gardner has been gardening for years, has significant experience and knowledge about his or her garden, including soil type, light exposure, hardiness zone, plant types and has experimented not only with plant choices, but locations too.  The Expert Gardner enjoys sharing his or her knowledge with others and takes pride in being able to guide newer Gardeners in their pursuit of knowledge."
May 2012 My veggie garden just after hand-tilling, adding compost, fertilizer and planting seeds. Still weeks away from the bounty.  


So, which style do you think you are?  My next post will ask the questions that will help you determine your garden style.  Let’s see if they align! 

From there we will start focusing on the specifics of preparing your garden.  So stay tuned.